Products
X


T-Shirts
Hoodies
Sweatshirts
Polos
Tank Tops
Accessories
Shorts & Pants
Caps
How to Use Google Forms to Collect T-Shirt Orders
How to Use Google Forms to Collect T-Shirt Orders (Free Template)
Collecting t-shirt orders from a group is one of those tasks that sounds simple until you're texting twelve people asking what size they ordered and whether they wanted navy or black.
Google Forms solves most of that. It's free, it works with Google Sheets, and everyone already has a Google account. This guide walks you through setting one up from scratch. And if you'd rather start from something pre-built, we made a template you can copy in one click.
[ Tiny Fish T-Shirt Order Form Template] Make a copy to use it!
When Google Forms is the right tool
Before you build anything, it's worth making sure this fits your situation. Google Forms works well when:
- You're pre-ordering shirts for an event, team, club, or trip
- You need to collect sizes, colors, names, or custom numbers from a group
- You're not sure how many of each size you'll need and want to collect before you commit
- You want responses to feed automatically into a spreadsheet without any manual data entry
If you're running a permanent online store, you'll want something built for e-commerce. But for a one-time or seasonal group order, Forms is hard to beat.
Step 1: Open Google Forms and create your form
Go to forms.google.com. If you're signed into Gmail you're already in. Just click the blank form to start.
Give it a clear, specific title. Spring Softball Uniforms 2026 or Johnson Family Reunion Shirts works better than T-Shirt Order Form because people who receive it will immediately know what they're filling out. Use the description field for any context your group needs: order deadline, when shirts will be ready, and whether payment is being handled separately.
Step 2: Build your questions
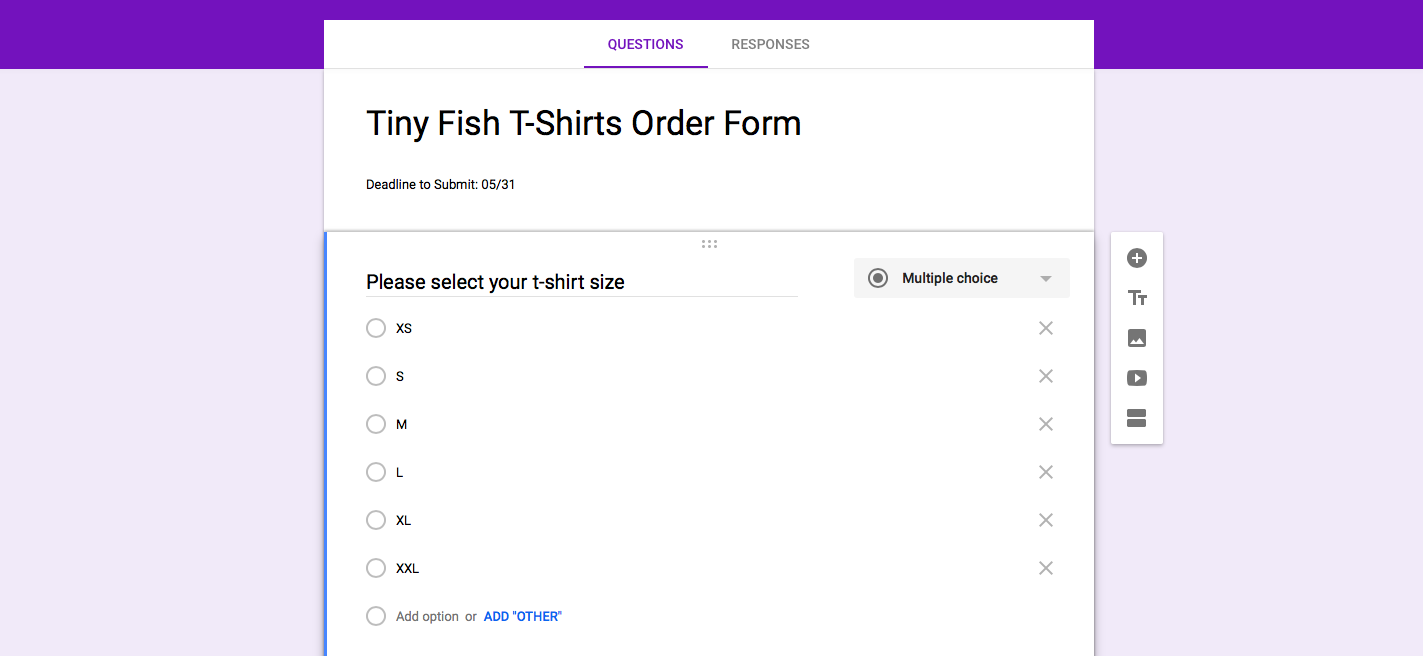
For a standard group t-shirt order, you'll typically need:
- Name (short answer)
- Email address (short answer, or collect automatically via settings covered below)
- Size (multiple choice: XS, S, M, L, XL, XXL. Add youth sizes if your group needs them.)
- Quantity (short answer or dropdown)
- Color (multiple choice, if you're offering more than one)
- Custom name or number (short answer, for sports uniforms or personalized pieces)
Google Forms will sometimes auto-suggest size options when you start typing. Accept them if they match, edit if they don't. Toggle the Required switch at the bottom of any question you can't afford to have left blank.
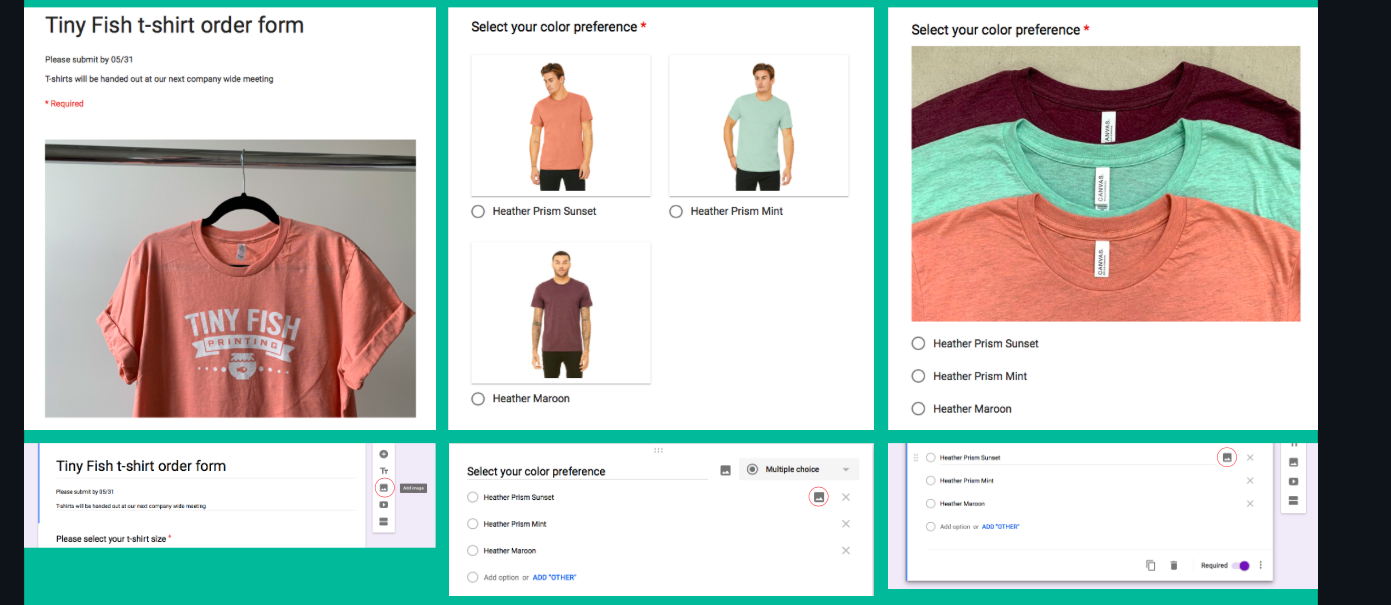
Step 3: Add an image of your design
If your artwork is finalized, upload it. People are more likely to commit, and less likely to complain later, when they can see exactly what they're ordering.
You can add a header image across the top of the whole form, or attach an image to a specific question. The second option is useful if you're showing color options side by side. Hover over any question and click the image icon that appears to the right.
Step 4: Adjust your settings
Click the gear icon at the top to open Settings. The most important one: turn on Collect email addresses. Without it, responses arrive anonymously and you'll have no way to follow up if something's missing.
Three others worth checking:
- Limit to 1 response (prevents duplicate submissions)
- Allow response editing (lets people fix their own mistakes without you touching the spreadsheet)
- Restrict to your organization (turn this off if you're sending to anyone outside your company's email domain)
Step 5: Send it
Click Send and choose your distribution method. For most group orders a shareable link is easiest. Paste it into a group chat, email, or Slack. If you're emailing directly from Forms, check the box to include the form in the email body rather than just a link. One fewer click for your recipients usually means more responses.
Step 6: Collect responses and build your order
Open the Responses tab in your form to see submissions as they come in. Click the Google Sheets icon to create a linked spreadsheet that updates automatically with every new submission.
From your sheet you can tally sizes, sort by color, and pull together your final quantities. When your deadline passes, go back into Settings and turn off responses so nothing slips in late.
[IMAGE: Screenshot of the Google Forms Responses tab with the Google Sheets export icon highlighted. Alt text: "Google Forms responses tab with Google Sheets export button"]
What to do with your spreadsheet
Once your form closes you'll have a clean spreadsheet with everything a printer needs: names, sizes, quantities, any customizations. That's your order.
If you still need a printer, we're Tiny Fish, a Rochester-based screen printing and fulfillment shop that's been doing this since 2007. Send us your spreadsheet, your design files, and your in-hands date and we'll take it from there. Standard turnaround is 10 business days, rush is available.
[→ Start your order with Tiny Fish]
Don't miss out on a thing - Sign up for our newsletter to get our blogs right in your inbox